|
|
|
Now..using your magic wand..select the open
area's inside the arches.
Go to selections..expand..by 1.
Flood fill with your wood pattern.
Keep selected...go to Image, Effects, Weave.
And use the same settings as before.( it should
still be set to them).
Deselect...now..using the magic wand ..select
all the little white squares.
Hold the shift key down to select them. When
you have all them selected...
hit Delete to delete them.
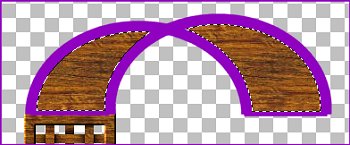
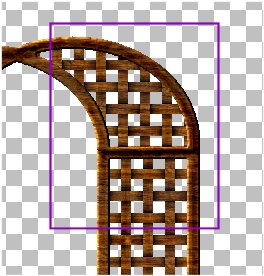
Now..use the Magic Wand to select the outline
of the arch.
( In this picture it will be the purple part)
Yours will depend on what you set your foreground
color to when you
drew your ellipse's.
Here is what it looks like selected
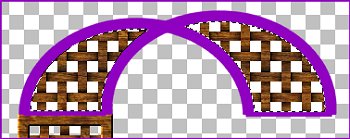
Use your flood fill to fill it with the wood
pattern again.
Then go to Inner Bevel and use the same settings
as before and apply.
Now you should have this.
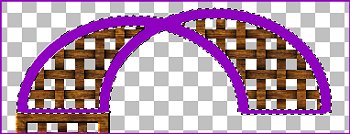
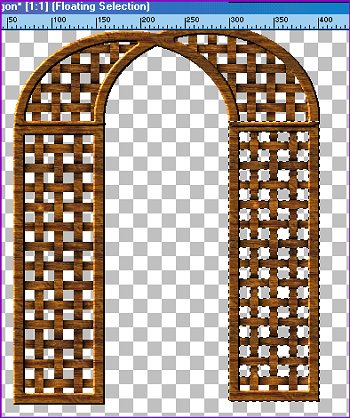
Now..go to the layers drop down box and click
on the layer named
"Merged" to make it active. Then draw a rectangle
box around the square lattice
and click somewhere on it to select it.
Once the lattice is selected...copy and paste
as new selection.
Keep new selection selected and move it over
to the right side and line it up
with the bottom of the arch.
Like this.
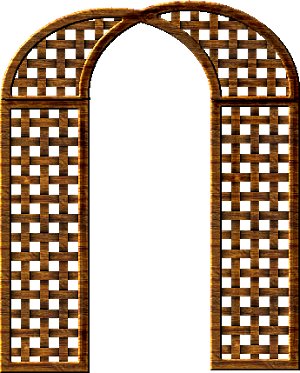
Deselect...go to layers...merge visible.
Now use the retouch tool set to
Darken RGB
Round
Size = 5
Hardness = 3
Opacity = 74
Step = 8
Density = 70
Darken the right side where the arch part and
the flat side meet.
The more times you run the tool over it ..the
darker it will get.
The object is to shade it a little.
Like this
Done !!!
Written and ©2000 by Jane Braz
All rights reserved.